- SciPy - Home
- SciPy - Introduction
- SciPy - Environment Setup
- SciPy - Basic Functionality
- SciPy - Relationship with NumPy
- SciPy Clusters
- SciPy - Clusters
- SciPy - Hierarchical Clustering
- SciPy - K-means Clustering
- SciPy - Distance Metrics
- SciPy Constants
- SciPy - Constants
- SciPy - Mathematical Constants
- SciPy - Physical Constants
- SciPy - Unit Conversion
- SciPy - Astronomical Constants
- SciPy - Fourier Transforms
- SciPy - FFTpack
- SciPy - Discrete Fourier Transform (DFT)
- SciPy - Fast Fourier Transform (FFT)
- SciPy Integration Equations
- SciPy - Integrate Module
- SciPy - Single Integration
- SciPy - Double Integration
- SciPy - Triple Integration
- SciPy - Multiple Integration
- SciPy Differential Equations
- SciPy - Differential Equations
- SciPy - Integration of Stochastic Differential Equations
- SciPy - Integration of Ordinary Differential Equations
- SciPy - Discontinuous Functions
- SciPy - Oscillatory Functions
- SciPy - Partial Differential Equations
- SciPy Interpolation
- SciPy - Interpolate
- SciPy - Linear 1-D Interpolation
- SciPy - Polynomial 1-D Interpolation
- SciPy - Spline 1-D Interpolation
- SciPy - Grid Data Multi-Dimensional Interpolation
- SciPy - RBF Multi-Dimensional Interpolation
- SciPy - Polynomial & Spline Interpolation
- SciPy Curve Fitting
- SciPy - Curve Fitting
- SciPy - Linear Curve Fitting
- SciPy - Non-Linear Curve Fitting
- SciPy - Input & Output
- SciPy - Input & Output
- SciPy - Reading & Writing Files
- SciPy - Working with Different File Formats
- SciPy - Efficient Data Storage with HDF5
- SciPy - Data Serialization
- SciPy Linear Algebra
- SciPy - Linalg
- SciPy - Matrix Creation & Basic Operations
- SciPy - Matrix LU Decomposition
- SciPy - Matrix QU Decomposition
- SciPy - Singular Value Decomposition
- SciPy - Cholesky Decomposition
- SciPy - Solving Linear Systems
- SciPy - Eigenvalues & Eigenvectors
- SciPy Image Processing
- SciPy - Ndimage
- SciPy - Reading & Writing Images
- SciPy - Image Transformation
- SciPy - Filtering & Edge Detection
- SciPy - Top Hat Filters
- SciPy - Morphological Filters
- SciPy - Low Pass Filters
- SciPy - High Pass Filters
- SciPy - Bilateral Filter
- SciPy - Median Filter
- SciPy - Non - Linear Filters in Image Processing
- SciPy - High Boost Filter
- SciPy - Laplacian Filter
- SciPy - Morphological Operations
- SciPy - Image Segmentation
- SciPy - Thresholding in Image Segmentation
- SciPy - Region-Based Segmentation
- SciPy - Connected Component Labeling
- SciPy Optimize
- SciPy - Optimize
- SciPy - Special Matrices & Functions
- SciPy - Unconstrained Optimization
- SciPy - Constrained Optimization
- SciPy - Matrix Norms
- SciPy - Sparse Matrix
- SciPy - Frobenius Norm
- SciPy - Spectral Norm
- SciPy Condition Numbers
- SciPy - Condition Numbers
- SciPy - Linear Least Squares
- SciPy - Non-Linear Least Squares
- SciPy - Finding Roots of Scalar Functions
- SciPy - Finding Roots of Multivariate Functions
- SciPy - Signal Processing
- SciPy - Signal Filtering & Smoothing
- SciPy - Short-Time Fourier Transform
- SciPy - Wavelet Transform
- SciPy - Continuous Wavelet Transform
- SciPy - Discrete Wavelet Transform
- SciPy - Wavelet Packet Transform
- SciPy - Multi-Resolution Analysis
- SciPy - Stationary Wavelet Transform
- SciPy - Statistical Functions
- SciPy - Stats
- SciPy - Descriptive Statistics
- SciPy - Continuous Probability Distributions
- SciPy - Discrete Probability Distributions
- SciPy - Statistical Tests & Inference
- SciPy - Generating Random Samples
- SciPy - Kaplan-Meier Estimator Survival Analysis
- SciPy - Cox Proportional Hazards Model Survival Analysis
- SciPy Spatial Data
- SciPy - Spatial
- SciPy - Special Functions
- SciPy - Special Package
- SciPy Advanced Topics
- SciPy - CSGraph
- SciPy - ODR
- SciPy Useful Resources
- SciPy - Reference
- SciPy - Quick Guide
- SciPy - Cheatsheet
- SciPy - Useful Resources
- SciPy - Discussion
SciPy - High Boost Filter
High-Boost Filter in SciPy
A High-boost filter is an image sharpening technique that enhances the high-frequency components such as edges and fine details, while retaining the original image's low-frequency content. It is often used to emphasize subtle details in images or restore blurred images.
We don't have a specified function in scipy.ndimage module of SciPy library but we can to implement this filter in SciPy with the help of low pass filters such as Gaussian filter. The high-boost filtered image can be calculated as follows −
Hb = A . I - G
Where −
- I: Original Image
- G: Smoothed version of the image which is usually obtained using a low-pass filter like Gaussian blur.
- A: Amplification factor i.e., boosting constant when A=1, it reduces to a high-pass filter.
We also have the an alternative representation of the High - Boost filter as follows −
Hb = (A - 1) . I + (I - G)
Where −
- (I - G): High-frequency components i.e., details and edges.
- (A - 1).I: Low-frequency content amplified by A1.
Properties of the High - Boost Filter
The High - Boost Filter exhibits some properties which are mentioned as follows −
- When A > 1 then the filter enhances the high-frequency components while retaining the low-frequency components of the original image.
- When A = 1 then the filter reduces to a standard high-pass filter by emphasizing only edges and details.
- High-boost filters provide a flexible sharpening mechanism where we can control the degree of sharpening through A.
Steps to Apply High Boost Filter
To apply the High - Boost Filter to an image we have to follow certain steps. Here are the steps to be followed −
- Smooth the image: Firstly we have to smooth the image by using a low pass filter such as Guassian filter to extract low-frequency components.
- Subtract the smoothed image: Next we have to subtract the smoothed image from the original image to extract the high-frequency components.
- Add back the original image: Finally we have to add back the original image multiplied by the amplification factor to retain and amplify the low-frequency content.
Basic High-Boost Filtering Example
Following is the example of the basic high boost filter applied to the given input image by using the function scipy.ndimage.guassian() −
import numpy as np
import matplotlib.pyplot as plt
from scipy import ndimage
from skimage import data, color

# Load a sample image (e.g., astronaut image from skimage)
image = color.rgb2gray(data.astronaut())  # Convert to grayscale

# Define the amplification factor
A = 1.5  # Adjust this value for more or less sharpening

# Create a smoothed version of the image using Gaussian filter
smoothed = ndimage.gaussian_filter(image, sigma=3)

# Compute the high-boost filtered image
high_boost = A * image - smoothed

# Plot the original, smoothed, and high-boost filtered images
plt.figure(figsize=(15, 5))

plt.subplot(1, 3, 1)
plt.title("Original Image")
plt.imshow(image, cmap='gray')
plt.axis('off')

plt.subplot(1, 3, 2)
plt.title("Smoothed Image (Low-Pass Filter)")
plt.imshow(smoothed, cmap='gray')
plt.axis('off')

plt.subplot(1, 3, 3)
plt.title(f"High-Boost Filtered Image (A = {A})")
plt.imshow(high_boost, cmap='gray')
plt.axis('off')

plt.show()
Here is the output of the basic high boost filter applied on the input image −

Varying Amplification Factor A
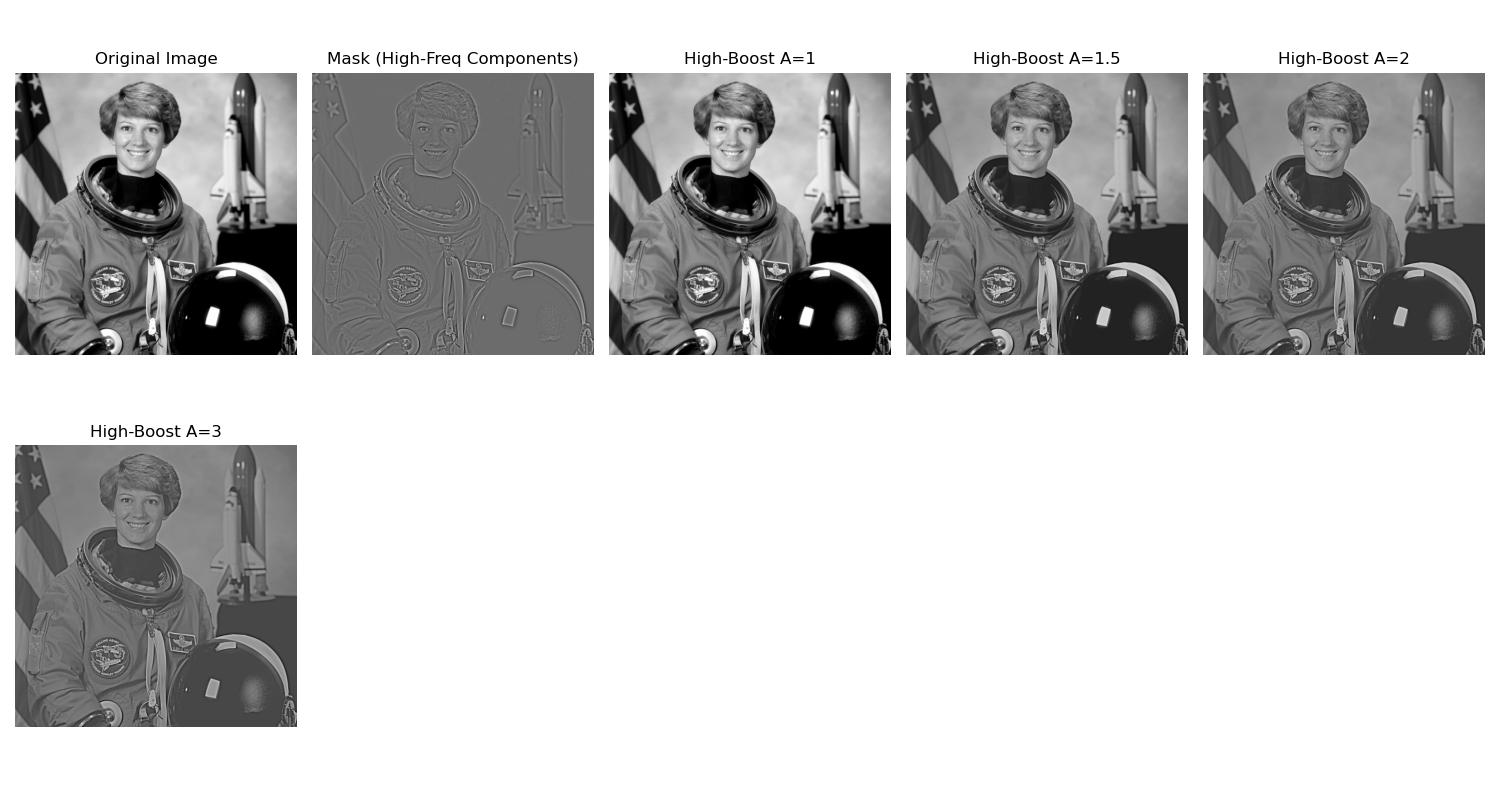
The high-boost filter is a popular image sharpening technique that enhances details by amplifying high-frequency components while retaining some of the original image's low-frequency content. The amplification factor A in the high-boost filter plays a key role in determining the intensity of the sharpening effect. The High boost filter formula in terms of Amplification factor can be given as follows −
High-Boost Image = A . I - Blurred Image = I + (A . 1) . Mask
Where −
- I: Original Image
- BlurredImage: Result of applying a smoothing (low-pass) filter to I.
- A: Amplification factor which is typically A 1.
- Mask: Difference between the original image and the blurred image (IBlurredImage).
For A = 1, the result is equivalent to standard image sharpening. For A > 1, the high-boost effect becomes stronger.
Below is an example of applying a high-boost filter to an image with different amplification factors.−
import numpy as np
import matplotlib.pyplot as plt
from scipy import ndimage
from skimage import data, color

# Load and preprocess the image
image = color.rgb2gray(data.astronaut())  # Convert to grayscale

# Define a Gaussian blur for low-pass filtering
blurred = ndimage.gaussian_filter(image, sigma=2)

# Compute the mask (high-frequency components)
mask = image - blurred

# Apply high-boost filtering with different A values
A_values = [1, 1.5, 2, 3]  # Amplification factors
high_boost_images = [image + (A - 1) * mask for A in A_values]

# Plot original, mask, and high-boost images
plt.figure(figsize=(15, 8))

# Original image
plt.subplot(2, len(A_values) + 1, 1)
plt.title("Original Image")
plt.imshow(image, cmap='gray')
plt.axis('off')

# Mask
plt.subplot(2, len(A_values) + 1, 2)
plt.title("Mask (High-Freq Components)")
plt.imshow(mask, cmap='gray')
plt.axis('off')

# High-boost images
for i, (A, hb_image) in enumerate(zip(A_values, high_boost_images), start=3):
    plt.subplot(2, len(A_values) + 1, i)
    plt.title(f"High-Boost A={A}")
    plt.imshow(hb_image, cmap='gray')
    plt.axis('off')

plt.tight_layout()
plt.show()
Here is the output of the high boost filter with varying Amplification factor A −
Comparing High-Pass & High-Boost Filters
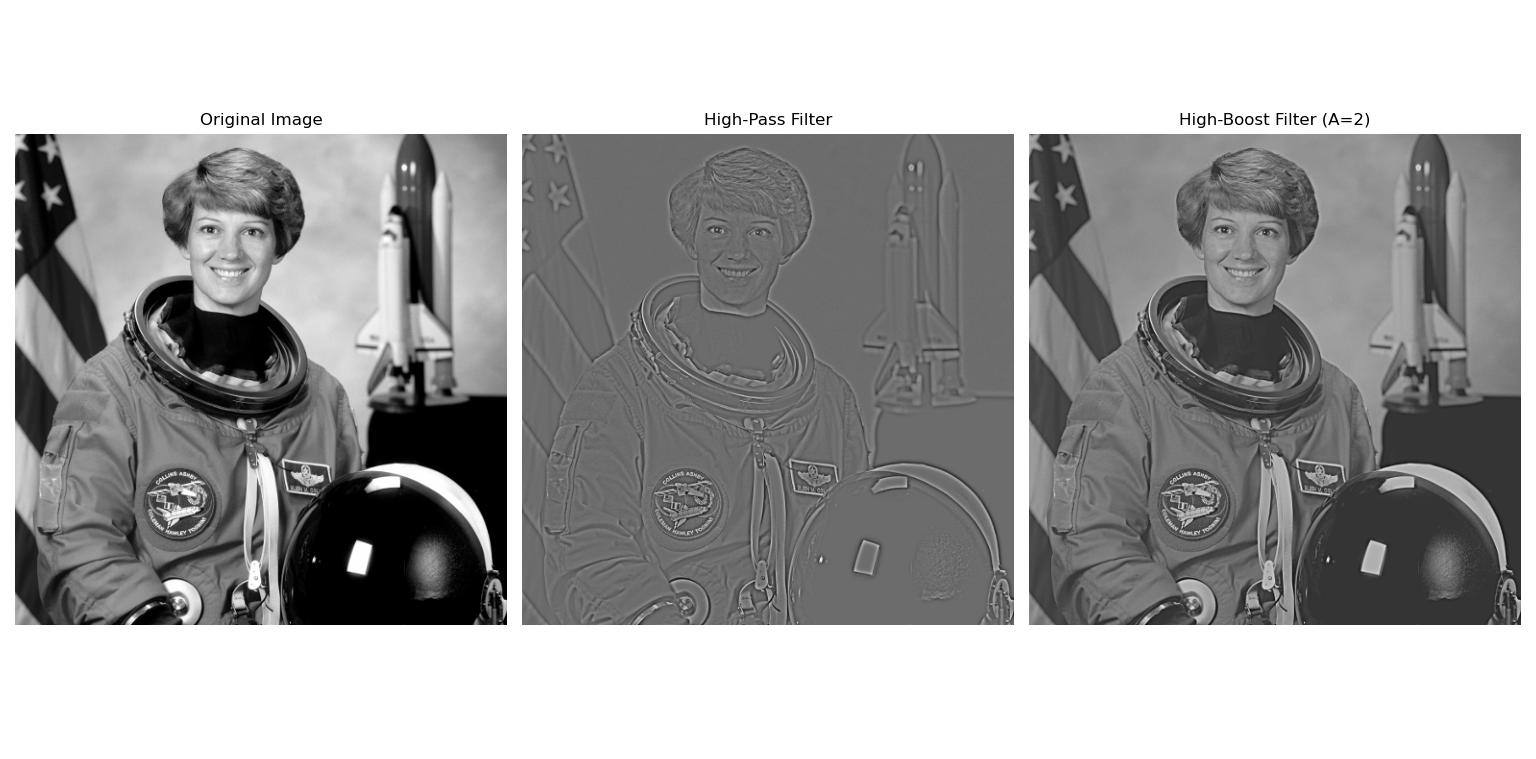
The high-pass filter and high-boost filter are closely related but they serve slightly different purpose. The High pass filter enhances high-frequency components by removing low-frequency components where as the High Boost filter enhances high-frequency components while retaining some of the original image's low-frequency content, controlled by an amplification factor A.
Following example highlights the difference between a high-pass filter (A=1) and a high-boost filter (A > 1).
import numpy as np
import matplotlib.pyplot as plt
from scipy import ndimage
from skimage import data, color

# Load and preprocess the image
image = color.rgb2gray(data.astronaut())  # Convert to grayscale

# Apply a Gaussian blur for low-pass filtering
blurred = ndimage.gaussian_filter(image, sigma=2)

# Compute the high-pass filter result
high_pass = image - blurred

# Compute the high-boost filter result with varying amplification factors
A = 2  # Amplification factor for high-boost
high_boost = image + (A - 1) * high_pass

# Plot original, high-pass, and high-boost images
plt.figure(figsize=(15, 5))

plt.subplot(1, 3, 1)
plt.title("Original Image")
plt.imshow(image, cmap='gray')
plt.axis('off')

plt.subplot(1, 3, 2)
plt.title("High-Pass Filter")
plt.imshow(high_pass, cmap='gray')
plt.axis('off')

plt.subplot(1, 3, 3)
plt.title(f"High-Boost Filter (A={A})")
plt.imshow(high_boost, cmap='gray')
plt.axis('off')

plt.tight_layout()
plt.show()
Here is the output image, which shows the comparision of the High pass and High Boost filters −