- Python Web - Django Framework
- Django Framework - Overview
- Django Framework - Users
- Django Framework - Installation
- Django Framework - Creating Application
- Python Web - Flask Framework
- Python Web - Flask Framework
- Flask Framework - Creating URL Routing
- Flask Framework - Using Templates
- Python Web - Pyramid Framework
- Python Web - Pyramid Framework
- Pyramid Framework - Core Concepts
- Pyramid Framework - Creating Application
- Python Web - Dash Framework
- Python Web - Dash Framework
- Dash Framework - App Layout
- Dash Framework - HTML Component
- Dash Framework - Visualization
- Python Web - py4web Framework
- Python Web - py4Web Framework
- py4web Framework - Dashboard
- py4web Framework - Creating Application
- Python Web - Miscellaneous
- Python Web - Web2py Framework
- Python Web - Choosing a Better Framework
- Python Web Development Libraries Resources
- Python Web - Quick Guide
- Python Web - Useful Resources
- Python Web - Discussion
Django Framework - Installation and Configuration
Before installing Django, we have to make sure that Python is installed. Assuming you are using virtualenv, a simple pip install django should suffice.
Installing virtual environment and Django
Below is the process to install virtual environment and Django in your windows environment −
D:\Projects\python\myenv>scripts\activate

(myenv) D:\Projects\python\myenv>pip3 install django
To verify if the Django is installed properly, type the code given below −
(myenv) D:\Projects\python\myenv>py
Python 3.14.2 (tags/v3.14.2:df79316, Dec  5 2025, 17:18:21) [MSC v.1944 64 bit (AMD64)] on win32
Type "help", "copyright", "credits" or "license" for more information.
>>> import django
>>> print(django.get_version())
6.0
>>>
Creating Django Project
Once the installation is completed, we need to create a Django project.
Running the below command in your windows machine will create the following django project −
django-admin startproject my_project_name
(myenv) D:\Projects\python\myenv>django-admin startproject myFirstDjangoProject

(myenv) D:\Projects\python\myenv>cd myFirstDjangoProject

(myenv) D:\Projects\python\myenv\myFirstDjangoProject>dir
 Volume in drive D is New Volume
 Volume Serial Number is B8D7-1C9E

 Directory of D:\Projects\python\myenv\myFirstDjangoProject

12-03-2026  11:05    <DIR>          .
12-03-2026  11:05    <DIR>          ..
12-03-2026  11:05               698 manage.py
12-03-2026  11:05    <DIR>          myFirstDjangoProject
               1 File(s)            698 bytes
               3 Dir(s)  176,592,863,232 bytes free

(myenv) D:\Projects\python\myenv\myFirstDjangoProject>
Typing dir will show one new file and one new directory as shown above.
manage.py − manage.py is a command-line-executable Python file which is just a wrapper around django-admin. It helps us manage our project which is implied in its name as well.
With this, it created a directory called, myFirstDjangoProject inside myFirstDjangoProject which represents the configuration root for our project. Let us explore much deeper into it.
Configuring Django
By calling the myFirstDjangoProject directory configuration root, we mean this directory holds the files necessary for generally configuring our Django project. Pretty much everything outside this directory will be focused solely on the business logic associated with the projects models, views, routes, etc. All points that connect the project together will lead here.
(myenv) D:\Projects\python\myenv\myFirstDjangoProject>cd myFirstDjangoProject

(myenv) D:\Projects\python\myenv\myFirstDjangoProject\myFirstDjangoProject>dir
 Volume in drive D is New Volume
 Volume Serial Number is B8D7-1C9E

 Directory of D:\Projects\python\myenv\myFirstDjangoProject\myFirstDjangoProject

12-03-2026  11:05    <DIR>          .
12-03-2026  11:05    <DIR>          ..
12-03-2026  11:05               433 asgi.py
12-03-2026  11:05             3,157 settings.py
12-03-2026  11:05               798 urls.py
12-03-2026  11:05               433 wsgi.py
12-03-2026  11:05                 0 __init__.py
               5 File(s)          4,821 bytes
               2 Dir(s)  176,592,863,232 bytes free

(myenv) D:\Projects\python\myenv\myFirstDjangoProject\myFirstDjangoProject>
__init__.py − This is empty and changes the directory into an importable Python package.
settings.py − As the name suggest, it is the place where most configuration items will be set.
urls.py − The URLs are set with urls.py. With this, we dont have to explicitly write every URL for the project in this file. However, we have to tell Django about where the URLs have been declared (i.e., we need to link other URL in urls.py).
wsgi.py − This is to help application in production and is similar to other applications like Flask, Tornado, Pyramid which exposes some app object.
Configurating the settings
Taking a look inside settings.py will reveal its considerable size and these are just the defaults. Other things that we need to take care are the static files, database, media files, cloud integration or other dozens of ways that a Django project can be configured. Lets understand some points mentioned in the settings.py file −
BASE_DIR − This is helpful for locating files. Inside the setting.py file, BASE_DIR parameter sets the absolute path to the base directory.
SECRET_KEY − It is used for making hashes. In general, we used secret_key for cookies, sessions, csrf protection and auth tokens.
DEBUG − We can set it to project running either in development or production mode.
ALLOWED_HOSTS − We provide the list of hostnames through which our application is being served. In development mode, it is optional to set; however, in production machine, we need to set our Django project.
INSTALLED_APPS − It is the list of Django apps that are currently installed and running in our Django project. In-built Django provides six installed apps as follows −
'django.contrib.admin'
'django.contrib.auth'
django.contrib.
django.contrib.sessions
django.contrib.messages
django.contrib.staticfiles
MIDDLEWARE − It helps our Django project to run. Its a python class that hooks into django request/response processing.
TEMPLATES − It defines how the document should be displayed in the frontend. Django templates are used for producing any text-based format.
WSGI_APPLICATION − Any server we set up has to know where the WSGI file is. In case youre using an external server, it will look in its own settings. By default, it points to objects in wsgi.py.
DATABASES − It sets to the databases our Django project is currently accessing. It is mandatory to set default database. In case we set the database of our choice, we need to mention few things related to database like - HOST, USER, PASSWORD, PORT, database NAME, and appropriate ENGINE.
STATIC_URL − It is the URL to use when referring to static files located in STATIC_ROOT. By default, its None.
However, we may need to add a path for static files. Go down to the end of the file, and just underneath the STATIC_URL entry, add a new one called STATIC_ROOT as shown below −
myFirstDjangoProject/settings.py
import os

STATIC_URL = '/static/'
STATIC_ROOT = os.path.join(BASE_DIR, STATIC_URL)
Setting up a Database
Theres a lot of different database software that can store date for your site. Well use the default one, sqlite3.
This is already set up in the below given part of your myFirstDjangoProject/settings.py −
DATABASES = {
    'default': {
        'ENGINE': 'django.db.backends.sqlite3',
        'NAME': BASE_DIR / 'db.sqlite3',
    }
}
To create a database for our blog, lets run the following in the console − py manage.py migrate (we need to be in the myFirstDjangoProject directory that contains the manage.py file.
You will get the following output if everything goes well −
(myenv) D:\Projects\python\myenv\myFirstDjangoProject>py manage.py migrate
Operations to perform:
  Apply all migrations: admin, auth, contenttypes, sessions
Running migrations:
  Applying contenttypes.0001_initial... OK
  Applying auth.0001_initial... OK
  Applying admin.0001_initial... OK
  Applying admin.0002_logentry_remove_auto_add... OK
  Applying admin.0003_logentry_add_action_flag_choices... OK
  Applying contenttypes.0002_remove_content_type_name... OK
  Applying auth.0002_alter_permission_name_max_length... OK
  Applying auth.0003_alter_user_email_max_length... OK
  Applying auth.0004_alter_user_username_opts... OK
  Applying auth.0005_alter_user_last_login_null... OK
  Applying auth.0006_require_contenttypes_0002... OK
  Applying auth.0007_alter_validators_add_error_messages... OK
  Applying auth.0008_alter_user_username_max_length... OK
  Applying auth.0009_alter_user_last_name_max_length... OK
  Applying auth.0010_alter_group_name_max_length... OK
  Applying auth.0011_update_proxy_permissions... OK
  Applying auth.0012_alter_user_first_name_max_length... OK
  Applying sessions.0001_initial... OK

(myenv) D:\Projects\python\myenv\myFirstDjangoProject>
Starting the Web Server
You need to be in the directory that contains the manage.py file. In the console, we can start the web server by running py manage.py runserver as follows −
(myenv) D:\Projects\python\myenv\myFirstDjangoProject>py manage.py runserver
Watching for file changes with StatReloader
Performing system checks...

System check identified no issues (0 silenced).
March 12, 2026 - 11:22:21
Django version 6.0, using settings 'myFirstDjangoProject.settings'
Starting development server at http://127.0.0.1:8000/
Quit the server with CTRL-BREAK.

WARNING: This is a development server. Do not use it in a production setting. Use a production WSGI or ASGI server instead.
For more information on production servers see: https://docs.djangoproject.com/en/6.0/howto/deployment/
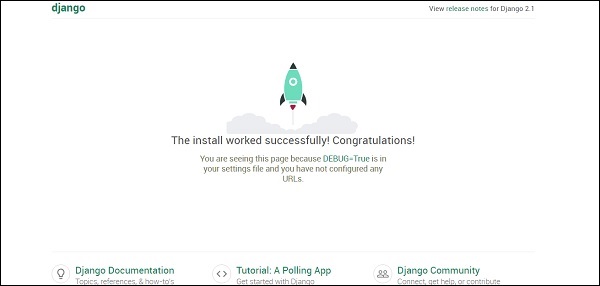
Now all you need to do is check that your website is running. Open your browser (Firefox, Chrome, Safari, Internet Explorer or whatever you use) and enter this address −
http://127.0.0.1:8000/
or
http://localhost:8000/ # As our webserver is running in our local machine only.
Congratulations! Youve just created your first website and run it using a web server!
While the web server is running, you wont see a new command-line prompt to enter additional commands. The terminal will accept next text but will not execute new commands. This is because the web server continuously runs in order to listen to incoming requests.
Django Models
We are trying to create a Django model that will store all the posts in our blog. But to make sure it works, we need to learn about objects.
Objects
Objects is a collection of properties and actions. Let us understand this with an example. Suppose we want to model a cat, we will create an object called Cat that has properties such as color, age, mood (good/bad/sleepy) and owner.
Then the Cat has some actions: purr, scratch or feed.
Cat
--------
color
age
mood
owner
purr()
scratch()
feed(cat_food)
CatFood
--------
taste
So basically we are trying to describe real things in code with properties (called object properties) and actions (called methods).
As we are building a blog, we need some text content and a title. It is also necessary to have the authors name, date of creation and also the date of publication.
So our blog will have the following objects −
Post
--------
title
text
author
created_date
published_date
Also we need to have some method that publishes that post. As we are now aware of what an object is, we can create a Django model for our blog post.
A model is a special kind of object in Django and is saved in the database. We will store our data in SQLite database.
