- Python Web - Django Framework
- Django Framework - Overview
- Django Framework - Users
- Django Framework - Installation
- Django Framework - Creating Application
- Python Web - Flask Framework
- Python Web - Flask Framework
- Flask Framework - Creating URL Routing
- Flask Framework - Using Templates
- Python Web - Pyramid Framework
- Python Web - Pyramid Framework
- Pyramid Framework - Core Concepts
- Pyramid Framework - Creating Application
- Python Web - Dash Framework
- Python Web - Dash Framework
- Dash Framework - App Layout
- Dash Framework - HTML Component
- Dash Framework - Visualization
- Python Web - py4web Framework
- Python Web - py4Web Framework
- py4web Framework - Dashboard
- py4web Framework - Creating Application
- Python Web - Miscellaneous
- Python Web - Web2py Framework
- Python Web - Choosing a Better Framework
- Python Web Development Libraries Resources
- Python Web - Quick Guide
- Python Web - Useful Resources
- Python Web - Discussion
Flask Framework - Using Templates
In previous chapter Flask Framework - Creating URL Routing, we've returned string while configuring urls for routing but normally we dont want to return a string, we return templates. For that we want to use a function render_template from flask, and return render_template with some input. So, below function will do our work −
from flask import render_template
return render_template('home.html')
Let us create a folder template and place home.html file in it.
Next, we will discuss about layout. Instead of using html head tag and body tag for every single template, we will design a layout to include head & body tags and wrap the current views or current template. For that, we have to create one separate file and call it layout.html. In this, we can put our normal head tag, body tag and all the other required tags.
We can create our new layout.html with the following lines of code −
layout.html
<!DOCTYPE html>
<html>
   <head>
      <meta charset="utf-8">
      <title>MyFlaskApp</title>
      <link rel="stylesheet" href="https://stackpath.bootstrapcdn.com/bootstrap/4.1.3/css/bootstrap.min.css">
   </head>
   <body>
      {% include 'includes/_navbar.html' %}
      <div class="container">
      {% block body %}
      {% endblock %}
      </div>
      <script src="https://stackpath.bootstrapcdn.com/bootstrap/4.1.3/js/bootstrap.min.js">
      </script>
   </body>
</html>
In above code, we have given the title track, MyFlaskApp, use css cdn in the head, and javascript in body block to enable the bootstrap.
Now, we have to create navbar for every single page. For that, we have to first create an include folder and then create _navbar.html file inside it. Now in the _navbar.html, we have to use the standard starter template from getbootstrap.com. The newly created _navbar.html file will be as follows −
_navbar.html
<nav class="navbar navbar-expand-md navbar-dark fixed-top bg-dark">
   <a class="navbar-brand" href="#">MyFlaskApp</a>
   <button class="navbar-toggler" type="button" data-toggle="collapse" data-target="#navbarCollapse"
      aria-controls="navbarCollapse" aria-expanded="false" aria-label="Toggle Navigation">
      <span class="sr-only">Toggle Navigation</span>
   </button>
   <div class="collapse navbar-collapse" id="navbarCollapse">
      <ul class="navbar-nav mr-auto">
         <li class="nav-item active">
            <a class="navbar-brand" href="/home">Home</a>
         </li>
         <li class="nav-item">
            <a class="navbar-link" href="/about">About</a>
         </li>
         <li class="nav-item">
            <a class="navbar-link disabled" href="/articles">Articles</a>
         </li>
      </ul>
      <form class="form-inline mt-2 mt-md-0">
         <input class="form-control mr-sm-2" type="text" placeholder="search" aria-label="search">
         <button class="btn btn-outline-success my-2 my-sm-0" type="submit">Search</button>
      </form>
   </div>
</nav>
And include this _navbar.html file into our layout.html file.
{% include 'includes/_navbar.html' %}
As we have the layout block, we can extend this block in our home file (home.html).
Our home.html file can be created using the below code −
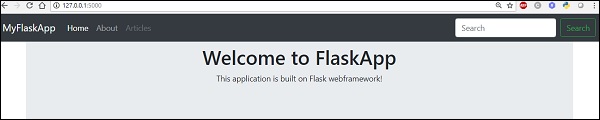
{% extends 'layout.html' %}
{% block body %}
   <div class="jumbotron text-center">
      <h1>Welcome to FlaskApp</h1>
      <p>This application is built on Flask webframework!</p>
   </div>
{% endblock %}
Using this if we try to run our main.py file, then we could see the below output in our browser −
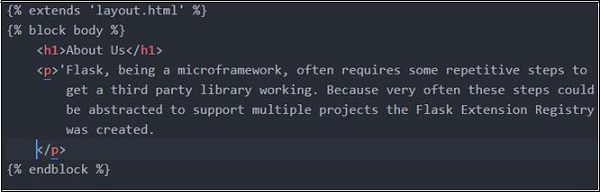
Now we want to activate (currently the tabs are not working) our about tab. Create a route for the about tab and create a template file, about.html.
About tab route in appflask.py will be as shown below −

about.html file will have the below content −
So Home and About are now taken care of. For Articles, we can create a new file (data.py) in the root directory, where we put the data and call it in our webpage.
data.py
def Articles():
   articles = [
      {
         'uid': 1,
         'title': 'Article_One',
         'body': 'Flask, being a microframework, often requires some repetitive step
            to get a third party library working. Because very often these steps could
            be abstracted to support multiple projects the Flask Extension Registry
            was created.',
         'Author': 'Rajesh Joshi',
         'Created-on': '07-09-2018'
      },
      {
         'uid': 2,
         'title': 'Article_Two',
         'body': "Flask, being a microframework, often requires some repetitive steps
            to get a third party library working. Because very often these steps could
            be abstracted to support multiple projects the Flask Extension Registry
            was created.",
         'Author': 'Rajesh J',
         'Created-on': '07-09-2018'
      },
      {
         'uid': 3,
         'title': 'Article_Three',
         'body': 'Flask, being a microframework, often requires some repetitive steps
            to get a third party library working. Because very often these steps could be
            abstracted to support multiple projects the Flask Extension Registry
            was created.',
         'Author': 'Joshi Rajesh',
         'Created-on': '07-09-2018'
      }
   ]
   return articles
Below is the code for articles.html, which will display article titles for each uid.
{% extends 'layout.html' %}
{% block body %}
   <h1>Articles</h1>
   {% for article in articles %}
      <li class="list-group-item">
         <a href="article/{{article.uid}}"> {{article.title}}</a>
      </li>
   {% endfor %}
{% endblock %}
To summarize, Flask is one of the most popular python web frameworks because of its lightweight. Although it is micro it is an extensible python web framework. By providing the required functionality, flask accelerates the development of simple web application. So Flask, is more suitable for smaller, less complicated applications.
